| Home All DIY Kits All Expansion Boards Accessories Web Store OEM/ODM Contact | |||||||||||||
| Set and Read the RTC time | X230 | ||||||||||||
|
To
setup I2C support on the Raspbian image from
http://www.raspberrypi.org/downloads <1> Download the latest Raspbian image and burn to your SD Card following the instructions on http://elinux.org/RPi_Easy_SD_Card_Setup <2> Go into the raspberry pi config utility and enable I2C.
Select 8 Advanced Options and then A7 I2C - Enable/Disable automatic loading. A prompt will appear asking Would you like the ARM I2C interface to be enabled?, select "Yes"   <3> Setting the Timezone Select 4 Internationalization Options and then I2 - Change Timezone .   Select your geographic area then your country or city  Select "OK" Select "Finish" to return to the command line and reboot your raspberry pi. <4> Once you have logged into your Raspberry Pi from the command line, run the following command to install i2c-tools:
<5> To ensure that the necessary kernel modules are loaded at boot, ensure your /boot/config.txt file has the entry below
Use your cursor keys to move to the last line and add a new line and then add:
Save your changes by pressing Ctrl-x then Y. <6> To ensure the RTC device is setup and the time synchronised when the Pi boots we need to edit another system file :
Add the following two lines before the exit 0 line : echo ds1307 0x68 > /sys/class/i2c-adapter/i2c-1/new_device hwclock -s so it looks something like : 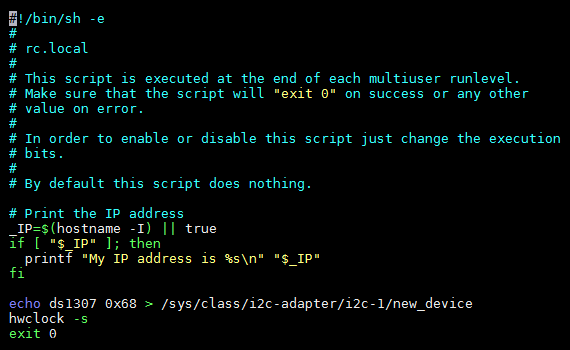 Save your changes by pressing Ctrl-x then Y. <7> Reboot the Raspberry Pi:
<8> Reading The Date And Time You can read the Pi’s system time using :
If you need to set the system time for any reason you can use the following command :
Once correct you can write the system date and time to the RTC module using :
You should be able to read the date and time back from the RTC using :
That's it! Next time you boot the time will automatically be synced from the RTC module. |
|||||||||||||
| RS232 Serial Port Usage | |||||||||||||
Pinout Diagram 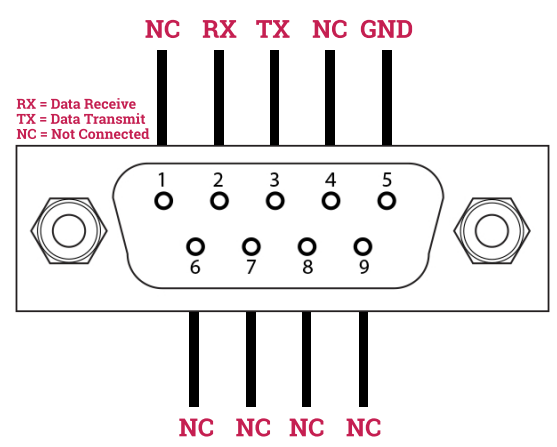 Using the RS232 port for terminal connections The RS232 port can be used for remote terminal connections on the Raspberry Pi allowing remote access and control without the need for an Ethernet connection. In order to connect the Com Pi to a desktop computer you will need to use a Null-Modem cable. A wiring diagram for making a Null-Modem cable can be found below. 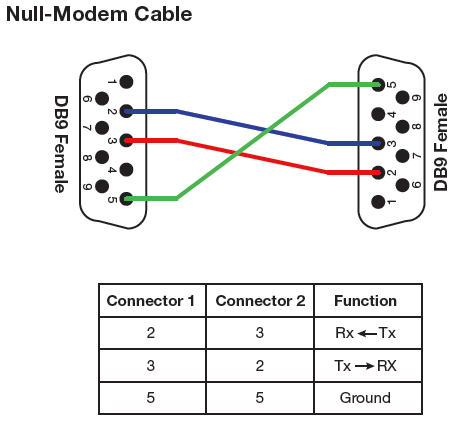 An USB to serial converter is required as well, depending on whether your computer has a serial port or not. then Plug the Null Modem cable into the X230, and then the USB to serial converter into the other end of the Null Modem cable. Finally, plug the USB cable into your computer. The USB to serial converter should be Plug N' Play. We need to find out what COM port it's using. To do this on Windows 10, open up the Device Manager by right-clicking on the start icon, and then clicking on "Device Manager". With the Device Manager open, you should see a section called "Ports (COM & LPT)" If you expand this section, you should hopefully see something along the lines of "USB-to-Serial Com Port (COM7)" The COM7 in brackets, in my case, is the COM port its using. 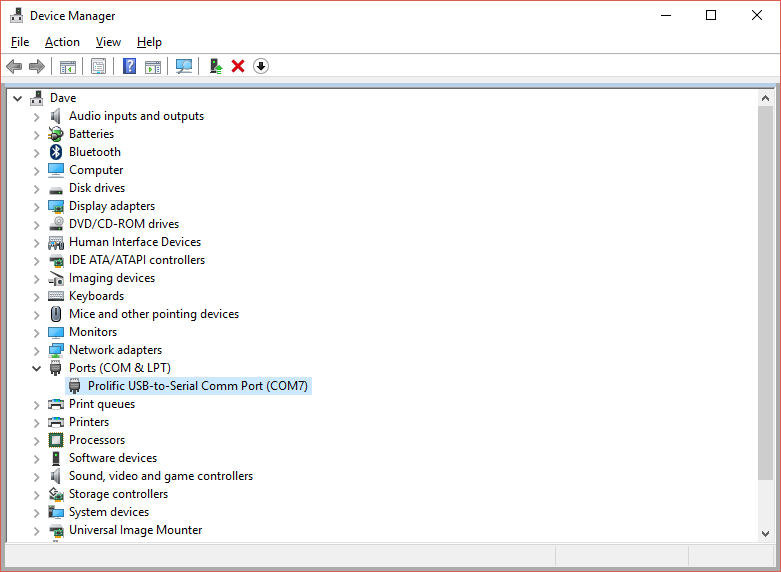 Now we know the COM port we can load up putty or any other serial interface program and connect to our Pi. Make sure "Serial" is selected, and that the "Serial line" is the same as the COM port you got from the Device Manager. Change the Speed (baude rate) to 115200 and click Open. 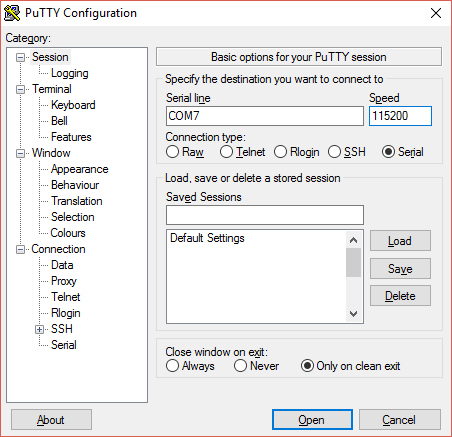 Now we have started the Serial connection, we can power on the Pi! After a few moments you should see some text running down the putty window and eventually you should be prompted to login. 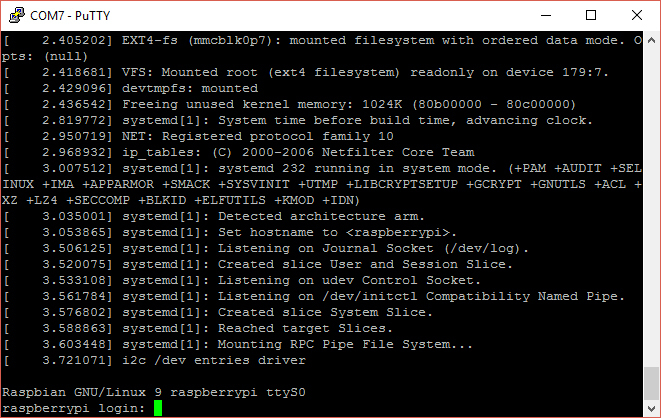 |
|||||||||||||
|
|
|||||||||||||
| © 2017 SUPTRONICS LIMITED, ALL RIGHTS RESEVERED | |||||||||||||