|
❶ |
Required tool - Pozidriv Screwdriver |
 |
|
|
| |
|
|
|
❸ |
Remove the yellow films |
|
|
|
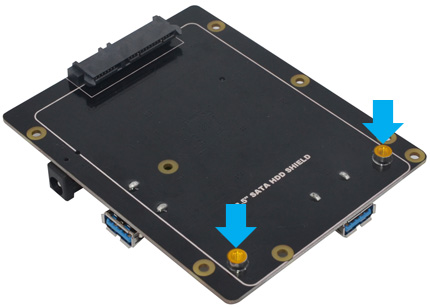
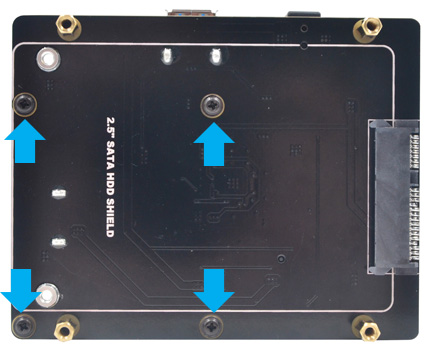
❹ |
Push a screws
(M2.5*6mm) up through
the mounting hole on the underside of the X820 and
screw the spacer (M2.5*12mm)
down until it is hand tight. |
|
 |
|
 |
| |
|
|
|
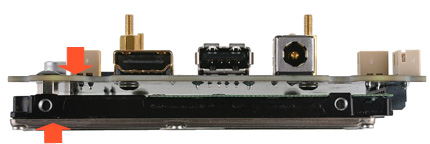
❺ |
Insert your hard disk
into the SATA socket. then use your thumb
and forefinger of left hand to press the X820
and HDD as arrow pointed
hardly and screw down
(M3*6mm screws).
|
|
|
|
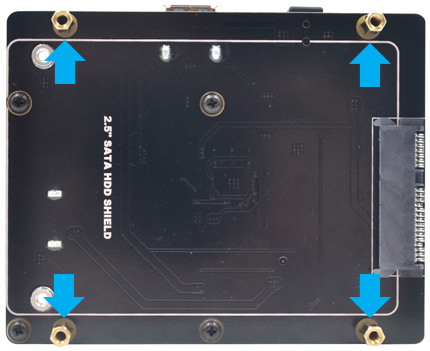
❻ |
Push a screw
(M3*6mm) up through
the mounting hole on the topside of the X820 and
screw the spacer (M3*15mm)
down until it is hand tight. |
|
 |
|
 |
| |
|
|
|
❼ |
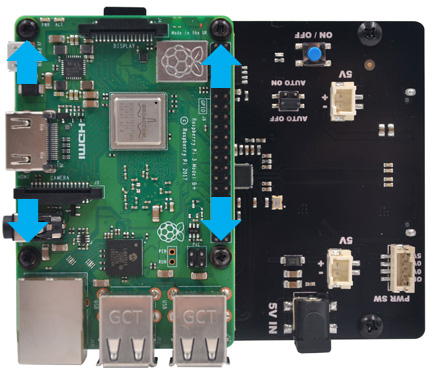
Place your Raspberry Pi
on top of X820 and screw down
(M2.5*6mm screws). |
|
|
|
❽ |
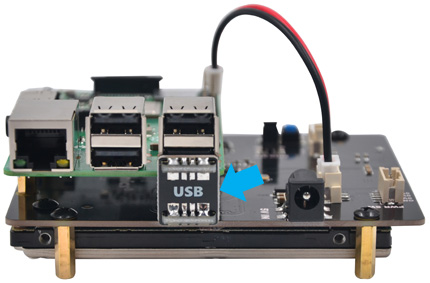
Insert the USB bridge.
The
direction of“USB”must be
upward. |
|
|
|
|
| |
|
|
|
❾ |
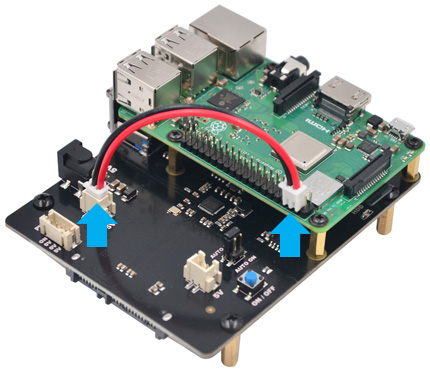
Connect the 2-pin power cable from X820
to Raspberry Pi pin header - Pin 4 (5V,
Read wire) and Pin 6
(Ground, Black wire). |
|
|
|
❿ |
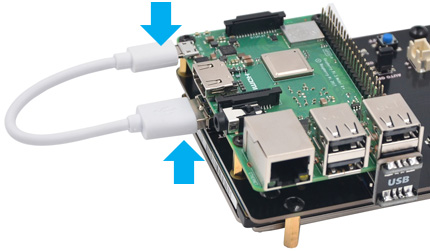
Optionally
power the
Raspberry Pi via Pi's Micro USB
socket.
(The 2-pin power cable must
be removed) |
|
 |
|
 |
| |
|
|
|
|
|
|
|
|
|
|
|
|
|
|