| |
|
| |
Raspberry Pi OS (64-bit)
|
| |
| |
Enabling
PCIe interface |
| |
First, enable the external PCIe port on the Raspberry Pi CM5.
Edit /boot/firmware/config.txt and add the following at the bottom:
|
| |
| pi@raspberrypi ~
$
sudo nano /boot/firmware/config.txt
|
|
|
| |
# Enable the PCIe external connector
dtparam=pciex1

WARNING
The Raspberry Pi CM5 is not
certified for Gen 3.0 speeds, and connections to PCIe
devices at these speeds may be unstable. |
| |
Save and exit. In nano, you do that by hitting CTRL + X,
answering Y and hitting Enter when prompted. |
| |
|
| |
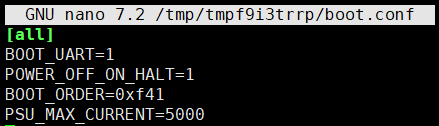
Set PSU_MAX_CURRENT=5000 in the
EEPROM config to bypass the PD negotiation and assume 5A is
available. |
| |
| pi@raspberrypi ~
$
sudo rpi-eeprom-config -e |
|
|
| |
|
| |
Add
PSU_MAX_CURRENT=5000 at the
end of the file that reads like this: |
| |
 |
| |
Save and exit. In nano, you do that by hitting CTRL + X,
answering Y and hitting Enter when prompted. |
| |
|
| |
Reboot the
Raspberry Pi |
| |
| pi@raspberrypi ~
$
sudo reboot |
|
|
| |
|
| |
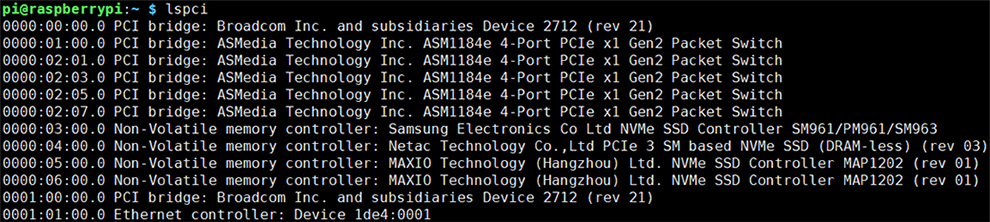
To view a list of
your PCIe devices, use the lspci command
in the terminal. |
| |
| pi@raspberrypi ~
$
sudo lspci |
|
|
| |
|
| |
|
| |
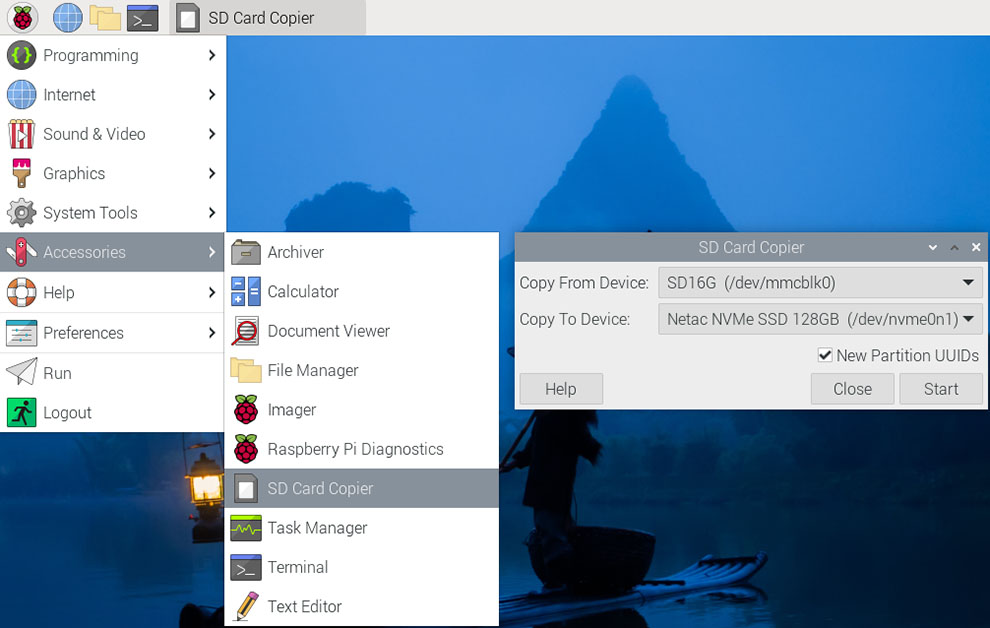
Clone your microSD boot volume to an NVMe SSD |
| |
Assuming you already have Raspberry
Pi OS on a microSD card that is booting your Raspberry Pi CM5
internally, and the NVMe SSD is connected and visible (check
if you see a device /dev/nvme0n1 after running lsblk), You
can use Raspberry Pi OS’s SD Card Copier app, which is under
the Accessories section of the Start menu, to clone your
microSD card directly to your NVMe SSD:
 |
|
|
| |
openmediavault 7 |
| |
| |
When using the X150x series IO
boards equipped with a 2.5G Ethernet port, a clean
installation of OpenMediaVault is necessary. Avoid using a
preloaded OpenMediaVault OS MicroSD card used for other
boards, as this could result in the system failing to obtain
an IP address.
|
| |
|
| |
How to Install OS on Raspberry Pi
Compute Module 5 with eMMC Storage
|
| |
| |
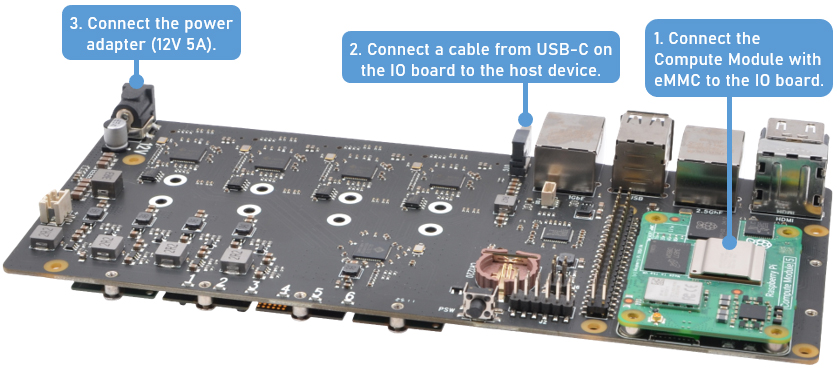
To program the eMMC storage on the
Compute Module 5, connect a host PC to the rear USB Type-C
port and it will disable eMMC boot automatically. After
entering eMMC programming mode and running the "rpiboot"
utility, the Compute Module 5 will then appear as a USB
device to the "host" PC, allowing it to be programmed.
For complete instructions and OS-specific guidance, please
consult the official
Raspberry Pi documentation. |
| |
|
| |
 |
| |
CAUTION! If the USB-C cable remains connected after
programming, the system will fail to boot. |
| |
|
| |
How to
Format and Mount an HDD or SSD on Raspberry Pi OS |
| |
| |
How to
Format and Mount the HDD/SSD on Raspberry Pi |
| |
Install
Gparted on Raspberry Pi |
| |
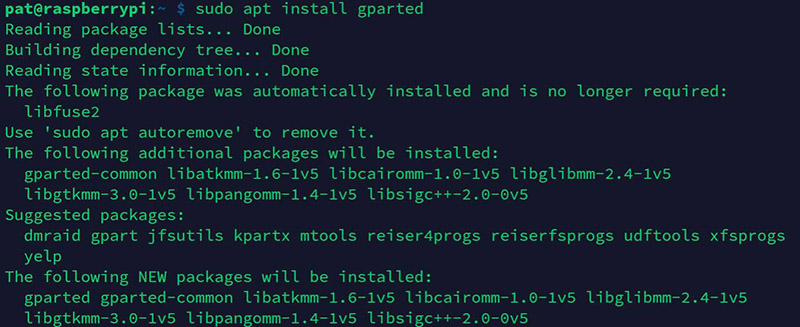
You can either use
a terminal, and simply use the following commands: |
| |
sudo apt update
sudo apt install gparted |
|
 |
| |
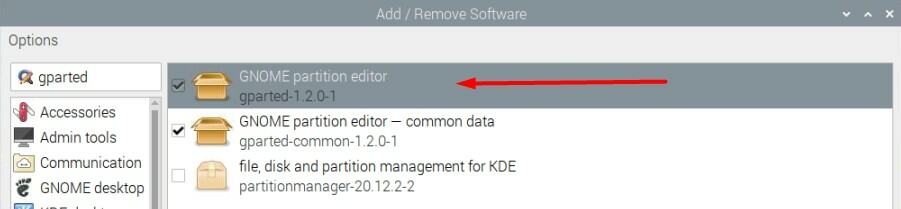
Or via the graphical tool (“Add/Remove Software”), open the
package manager and look for Gparted: |
|
 |
| |
Check the box corresponding to gparted, and click “Apply” to
start the installation. |
| |
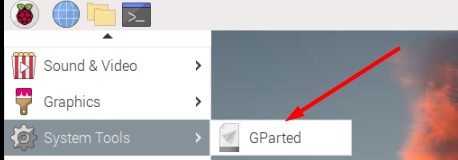
Once installed, Gparted should be available in the main
menu, under System Tools: |
|
 |
| |
|
| |
Use
Gparted on Raspberry Pi |
| |
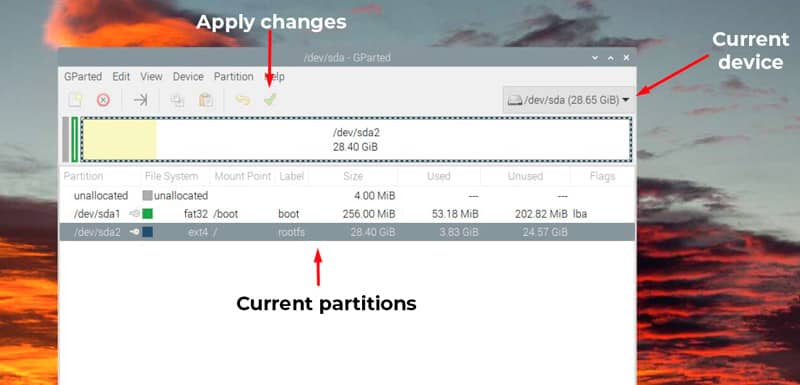
When you start
Gparted, you need to type your password (administrator
privileges are required).
Then, you’ll get an interface looking like: |
|
 |
| |
Start by picking the disk you
want to modify in the top-right corner.
Reminder: It’s not possible to make changes on the
disk you are currently using. You have to install Raspberry
Pi OS on another device, and then plug the drive you want to
edit.
Once done, you can change anything with a right-click on the
partition name or in the graphical representation. I will
show you how to resize a partition or create a new one.
|
| |
Resize a partition
You need to unmount the partition before resizing it.
That’s why you can resize the system partition once
the system is loaded.
As Raspberry Pi OS will automatically mount all partitions,
the first step is to right-click on it, and choose
“Unmount”:
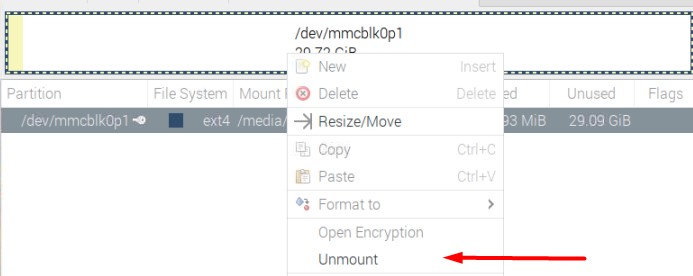
Then, you have access to the Resize/Move option in the menu:
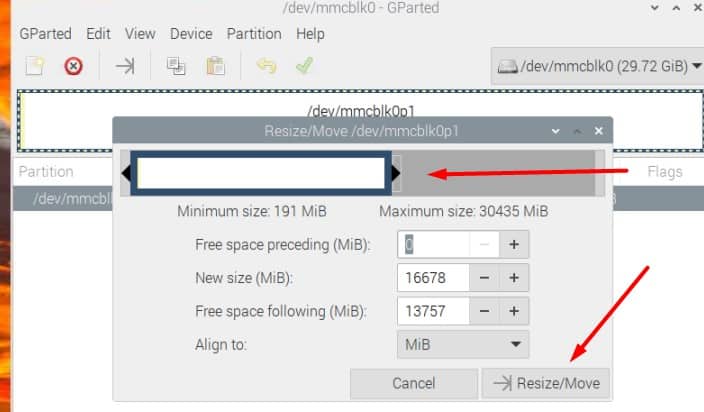
You can either move the cursor on the graphical
representation to resize the current partition or type the
new size in the form. Then, click on “Resize/Move”
to save your changes.
The last step is to click on the green tick to
apply the changes on your disk.
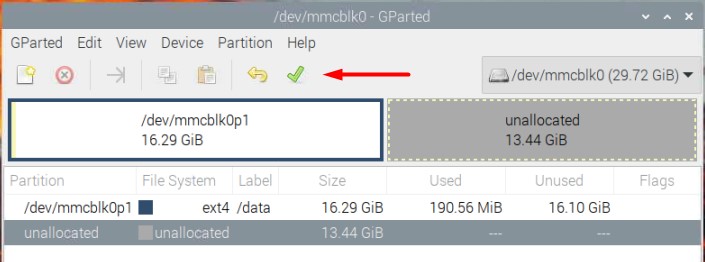
Raspberry Pi OS should now automatically mount the partition
each time.
Create a new partition
Once the disk is selected, make sure you have some
unallocated space available to create a new partition.
If not, you need to resize an existing partition first (or
just delete one if you don’t need it anymore).
Then, click on the unallocated space, and choose
“New” in the dropdown menu.
A form will show up. Make sure to check the values where I
added a red arrow:
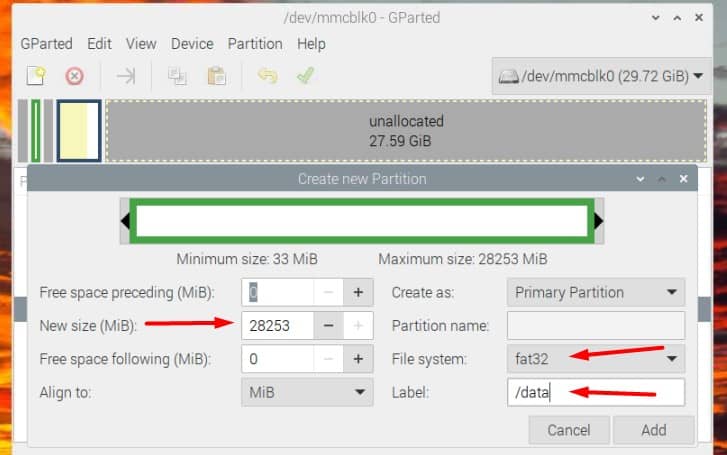
At least, you need to set the new size (it will use
all the space by default), the file system (fat32 for a
small partition that you want to read on Windows, ext4 if
you’ll only use it on the Raspberry Pi).
You can also choose a label, that will be used in the file
explorer.
Once done, click “Add”. You’ll directly see the
impact of your changes in the graphic representation.
But you need to click on the green check to apply the
changes on the disk.
It may take a few minutes, depending on the partition size
and hardware you use.
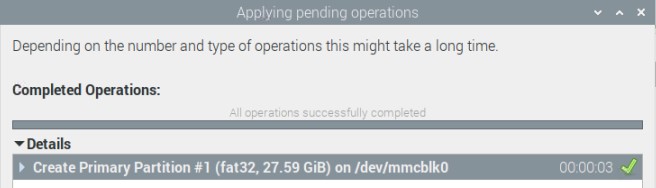
Once done, you’ll get a success message like this
one:
If you want to access the new partition within the file
explorer, the easiest way is to unplug the USB jumper and
plug it in again. Raspberry Pi OS will automatically mount
the new partition:
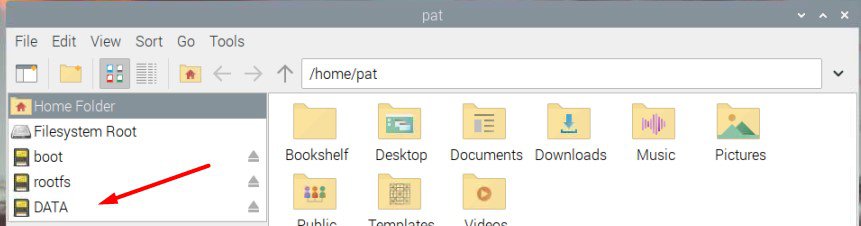
That’s it, you can now use it and create files in
this folder. |
| |
|
| |
Mount a HDD/SSD
with a command on a Lite version
Find the virtual drive name
Before doing anything else, you need to
find the current name of the drive.
Once you plug it in, Raspbian will detect the drive and
partitions, and assign a name to it.
Follow this procedure to find it:
- We’ll use “fdisk” to
list the current devices on the Raspberry Pi.
- Use the command below:
pi@raspberrypi ~
$ sudo fdisk -l
- A list will
appear, and most of the time your HDD/SSD drive is
the last item, so it’s easy to read.
In my case, I have this:

- You have two
things to note (squared in red):
1) The partition name,
assigned by Raspberry Pi OS: /dev/sda1 here.
2) The file system type:
FAT32 here.
- Once you know
this, you have everything you need to move forward.
If you are not sure which one is your drive, the disk size
may help you select the correct one (7.5G in my case). My SD
card is 32G and is always identified as /dev/mmcblk0.
Mount the drive
Now that you know the device and partition name, use the
following procedure to mount it:
- Create a new folder in /media.
We’ll mount the USB drive in this folder, but you
need to create it before:
pi@raspberrypi ~
$ sudo mkdir /media/usb
- Mount the drive to this place with this
simple command:
pi@raspberrypi ~
$ sudo mount /dev/sda1
/media/usb -o umask=000
Don’t forget to replace parameters if
needed.
The syntax is “mount [PARTITION]
[FOLDER]”.
The -o allows you to add extra options.
Most of the time you will need to add the umask option to
allow the standard users to write on the device.
Automatic mount on boot
As you’ll quickly see, you need to use the mount command
each time you reboot your Raspberry Pi.
But there is something you can do to mount it automatically
on boot:
- Get the partition id
of your device:
pi@raspberrypi ~
$ sudo blkid
- You’ll get something like this:

The PARTUUID is the value square in red, on the /dev/sdb1
line.
- Open the /etc/fstab file:
pi@raspberrypi ~
$ sudo nano /etc/fstab
- Paste this line, or something similar
depending on your values:
PARTUUID=b951dfde-01
/media/usb ntfs defaults,umask=000 0 0
- Fstab is a file to store drives and
options related to it.
And if the drive is plugged in on boot, it will mount
it directly.
- Save and exit (CTRL+O, CTRL+X).
Now you can reboot your system and check that everything
works fine. |
