| Home All DIY Kits All Expansion Boards Accessories Web Store OEM/ODM Contact | ||||||||||||||||||
| X3000 Mini PC Kits Tech Spec and Instructions | ||||||||||||||||||
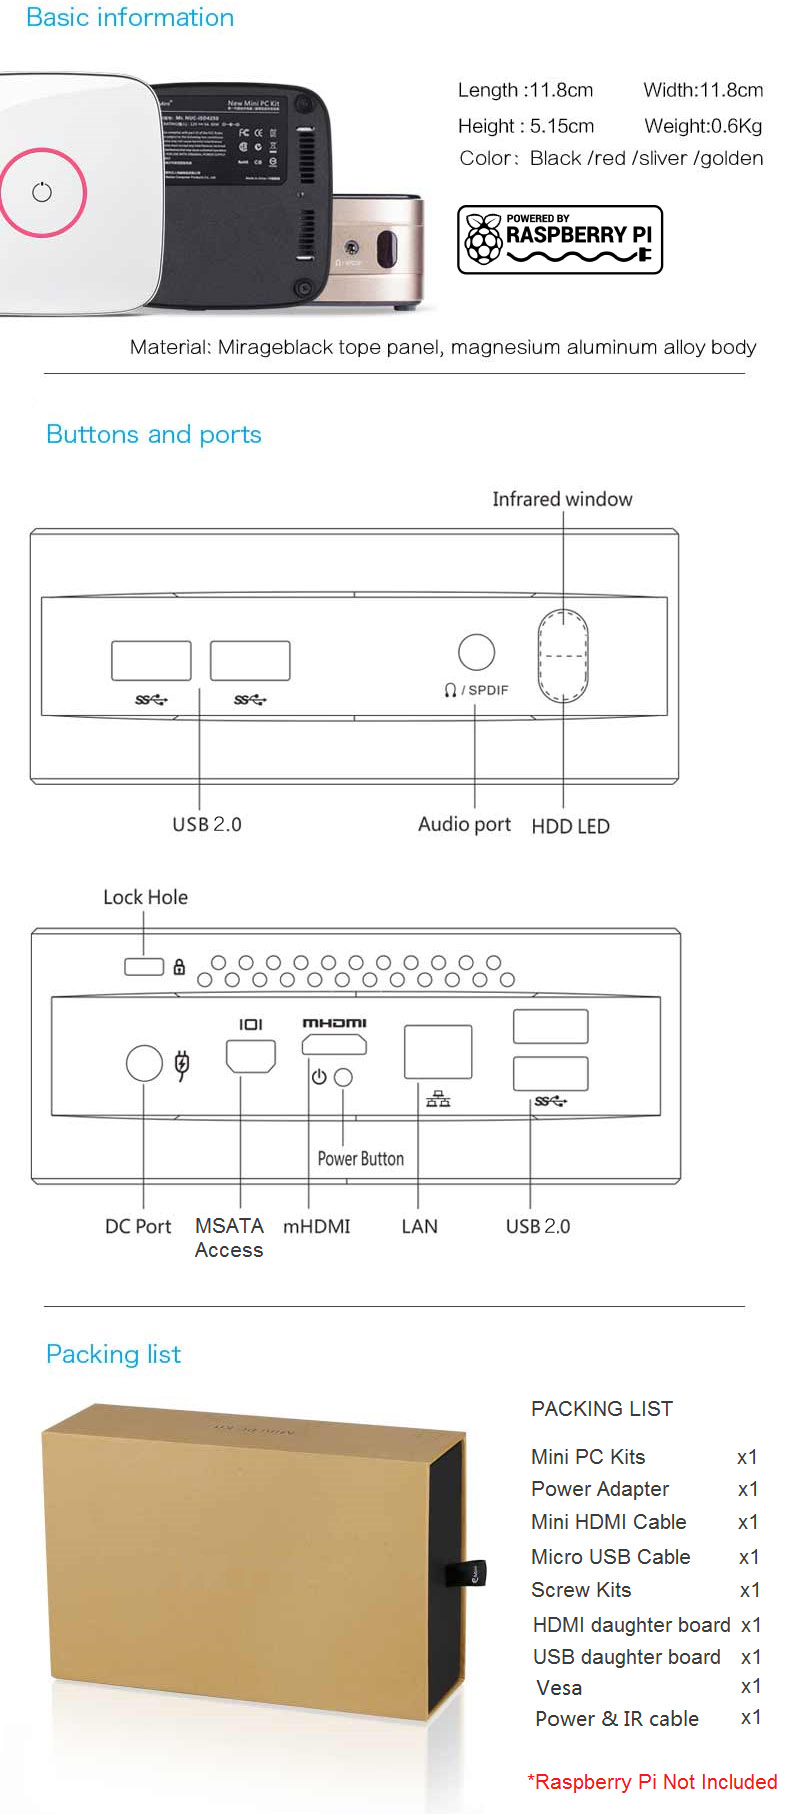
|
Tech Specs |
||||||||||||||||||
|
||||||||||||||||||
 |
||||||||||||||||||
| A. FITTING THE RASPBERRY PI | ||||||||||||||||||
|
Required Accessories 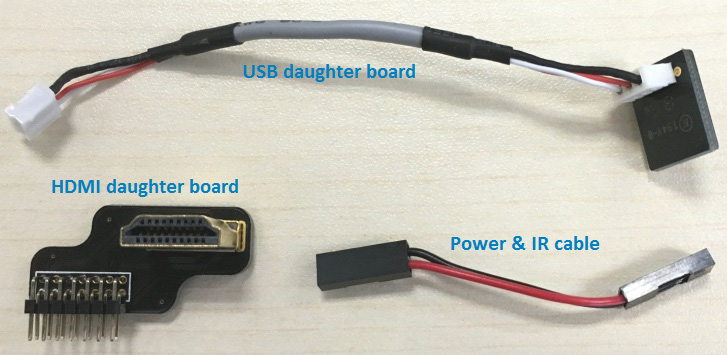 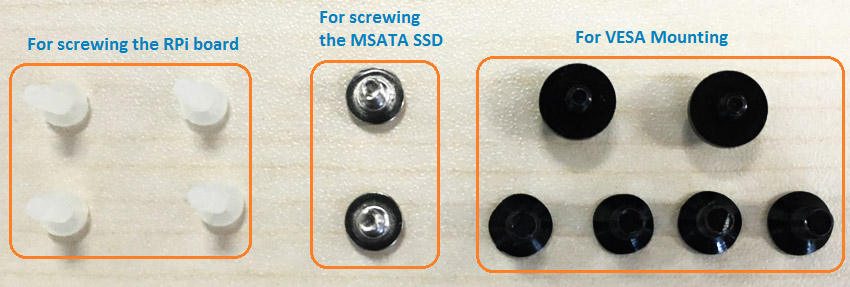 Accessories Installation 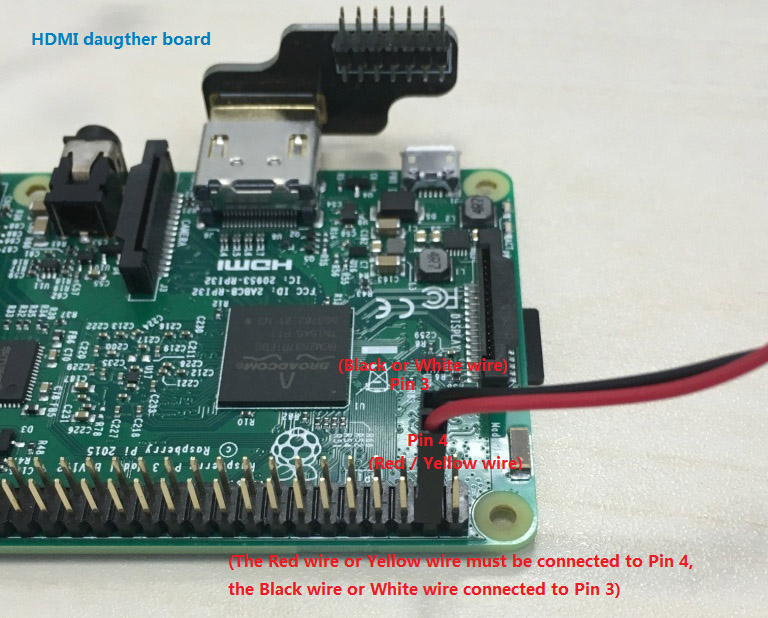 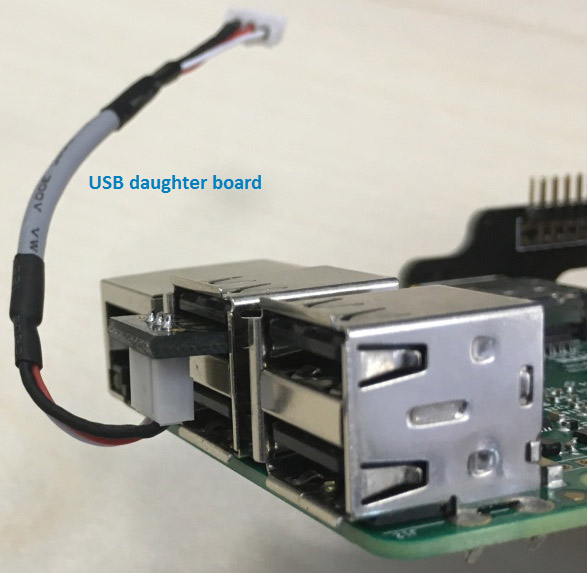 Raspberry Pi board Installation 1) Remove the four screws at the bottom of the chassis and remove the bottom cover 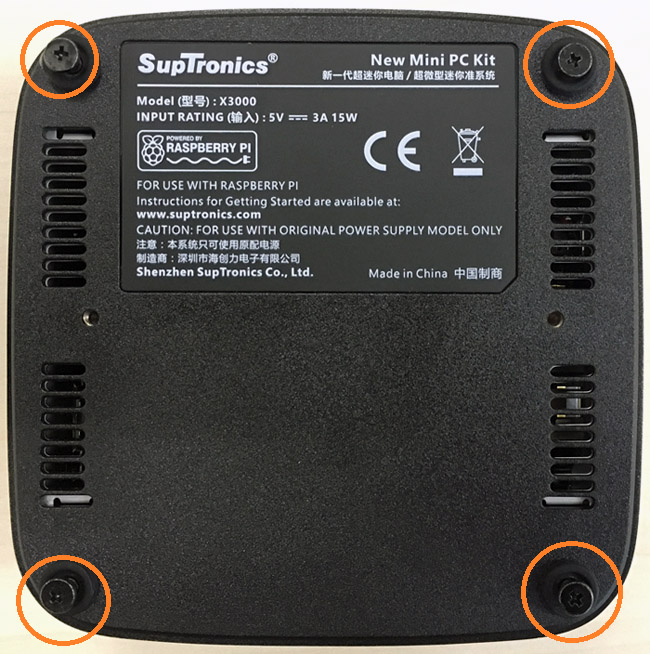 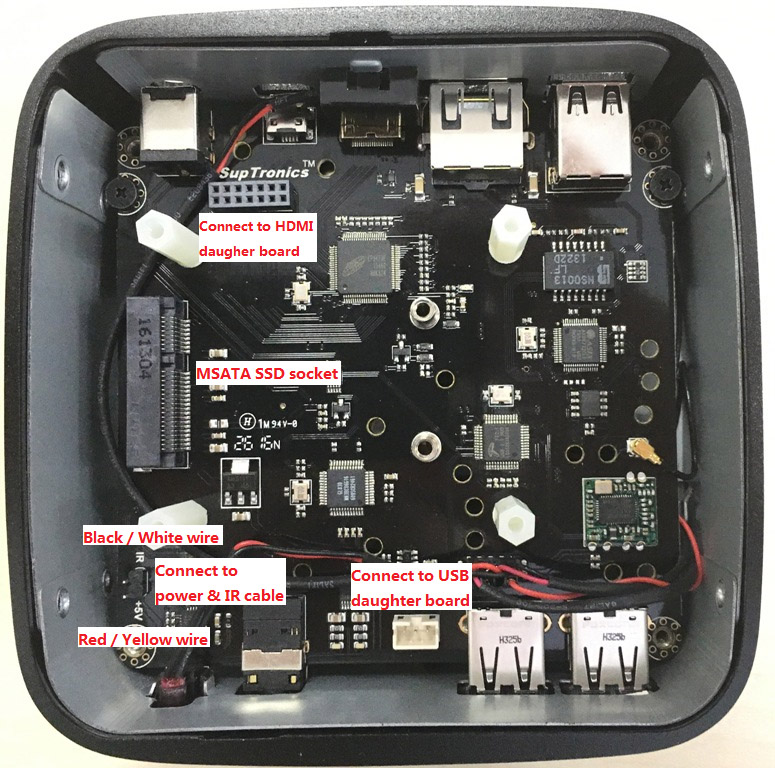 MSATA SSD SHOULD BE INSTALLED BEFORE FITTING THE RASPBERRY PI. 2) Connect the power & IR cable from Raspberry Pi to the 2-pin male pin header 3) Plugs the HDMI daughter board into the 14-pin HDMI female pin header 4) Connect the cable of USB daughter board to the 3-pin PH connector 5) Screwing the Raspberry Pi board 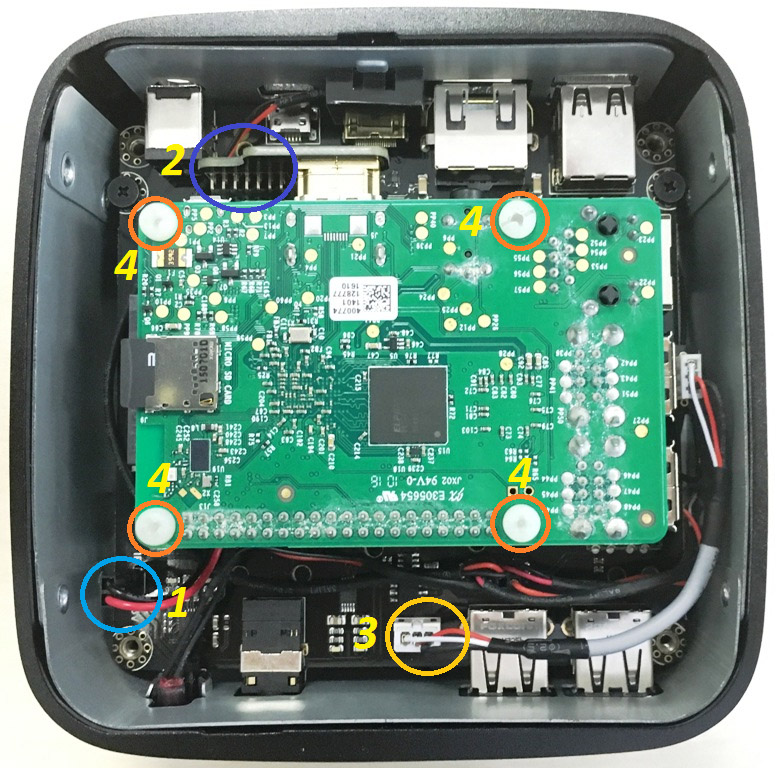 |
||||||||||||||||||
| B. POWER ON / OFF | ||||||||||||||||||
|
TO TURN ON 1) HDMI cable and power adapter should be connected before powering on. 2) Touch the power symbol and hold until the colorful breathing light is ON.  TO SHUTDOWN 1) Power off your system using the system menu - IMPORTANT! 2) Touch the power symbol and hold until the colorful breathing light is OFF. 3) It is recommended to unplug the power supply unit when you are not using it. |
||||||||||||||||||
| C1. OPERATING SYSTEM CONFIGURATION - OSMC | ||||||||||||||||||
| C2. OPERATING SYSTEM CONFIGURATION - VOLUMIO | ||||||||||||||||||
| C3. OPERATING SYSTEM CONFIGURATION - RASPBIAN JESSIE | ||||||||||||||||||
Based on RASPBIAN JESSIEVersion: March 2016 Release date: 2016-03-18 Kernel version: 4.1 HDMI setting<1> To ensure that the necessary kernel modules are loaded at boot
<2> Uncomment following three lines in config.txt by removing '#' located at start of the line. (check Images below)  hdmi_force_hotplug=1 pretends that HDMI device is always attached hdmi_group specifies whether monitor is DMT type (Computers) or CEA type (TV) hdmi_mode specifies the resolution of monitor. <3> For hdmi_group value selection : If you’re using output as Computer monitor then replace value ’1′ with ’2′, so the new config will be like :
(Select value 1 for TV, Select value 2 for monitor) <4> For hdmi_mode value selection : Now open eLinux RPi config scroll down, there in hdmi_mode two tables are given, select the correct resolution as per your monitor. (Table1 if you’re using TV & Table2 if you’re using Monitor) Since my monitor’s resolution is 1440×900 px, hdmi_mode=47 fits me the best. So, the modified config.txt will be like.
Overall my uncommented lines will look something like :  <5> adding the "hdmi_drive=2" line at the bottom 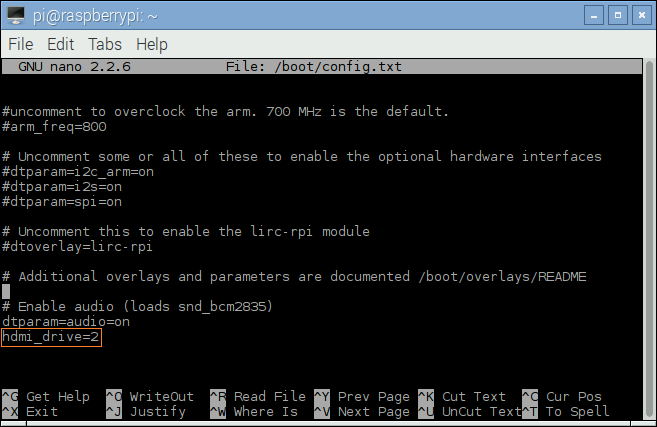 <6> Save your changes by pressing Ctrl-x then Y <7> Reboot your Raspberry Pi
<8> Mouse right click the speaker icon and select audio output of HDMI  Testing the IR receiver<9> Installing LIRC
<10> Add the two lines below to /etc/modules . This will start the modules up on boot. Pin 8 bellow will be used to take the output from the IR sensor.
.png) <11> Save your changes by pressing Ctrl-x then Y <12> If you are using 3.18.x RaspberryPi firmware you must modify one additional file for the lirc-rpi kernel
extension to be loaded:Edit your /boot/config.txt file
and add: .png) <13> Edit /etc/lirc/hardware.conf and have it appear exactly as shown below.
# /etc/lirc/hardware.conf
#
# Arguments which will be used when launching lircd
LIRCD_ARGS="--uinput"
# Don't start lircmd even if there seems to be a good config file
# START_LIRCMD=false
# Don't start irexec, even if a good config file seems to exist.
# START_IREXEC=false
# Try to load appropriate kernel modules
LOAD_MODULES=true
# Run "lircd --driver=help" for a list of supported drivers.
DRIVER="default"
# usually /dev/lirc0 is the correct setting for systems using udev
DEVICE="/dev/lirc0"
MODULES="lirc_rpi"
# Default configuration files for your hardware if any
LIRCD_CONF=""
LIRCMD_CONF=""
The highlighted text are the parts that will need changing, though it’s worth checking the rest of the text incase you have a different initial configuration. <14> Save your changes by pressing Ctrl-x then Y <15> Reboot the Raspberry Pi
<16> Run these two commands to stop lircd and start outputting raw data from the IR receiver:
<17> Point a remote control at your IR receiver and press some buttons. You should see something like this:  |
||||||||||||||||||
|
TECHNICAL SUPPORT
sales@suptronics.com |
SALES AND AGENT sales@suptronics.com |
SUPTRONICS
LIMITED All Rights Reserved. |
||||||||||||||||