| |
How to install Raspberry
Pi Imager
Raspberry Pi Imager is free to install from
the official Raspberry Pi website. It's available
for MacOS, Windows, and Ubuntu systems.
1. Visit the
Raspberry Pi download page.
2. Download the
Raspberry Pi Imager installer for your Operating
System.
3. Run the
installer and follow the prompts to complete the
setup.
Write a Raspberry Pi Imager built-in image

1. Launch
Raspberry Pi Imager.
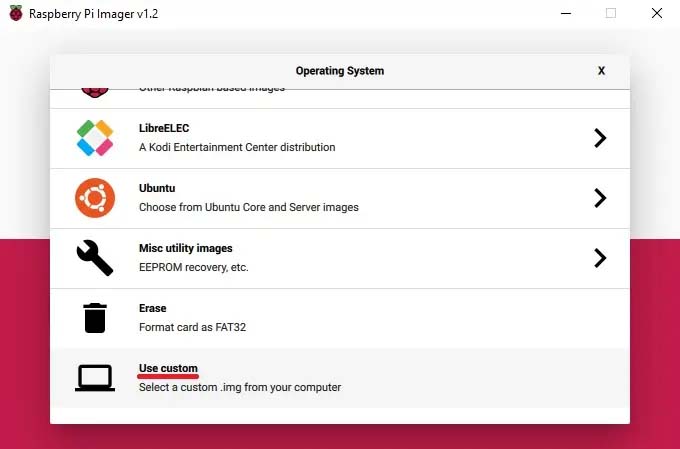
2. Click Choose OS.
3. Select Use custom to write an
unlisted image.
4. Click Choose SD card.
5. Select from the list the SD card you want to
write to.
6. Click Write to begin the image
writing process.
When the imager is finished,
you can connect your microSD card to the Pi and boot
it up.
Raspberry Pi Imager alternatives
If for whatever reason you
don't want to or are unable to use Raspberry Pi
Imager, you can opt to use an alternative
application. Here are a couple we've relied on over
the years leading up to the new imager release.
-
balenaEtcher - The application
runs on Windows, MacOS, and Ubuntu operating
systems.
- Win32
Disk Imager - This imaging software is
designed for Windows machines.
|
|

